
You spend hours cutting clean miters, dovetails, or rabbets, only to discover deep, silver-gray dents in the wood right where the clamp heads rested during glue-up. Clamping pressure is necessary to pull joints tight and hold them steady while adhesive support, but the tools designed to hold workpieces together are often rough enough to damage the very surface you plan to finish. Once wood grain is crushed under hundreds of pounds of pressure, sanding those divots flush requires removing substantial material, which can ruin the proportions of a small drawer or delicate jewelry box.
Preventing these marks does not require expensive specialty machinery. It requires an understanding of how timber reacts to mechanical force, along with a few shop-made accessories that spread pressure across a wider surface area. By using sacrificial blocks, choosing the right style of clamp for four-sided assemblies, and managing adhesive squeeze-out properly, you can pull a box square and tight while leaving the outer faces pristine.
Why raw metal jaws bruise soft wood fibers
Why does cast iron or forged steel leave such stubborn dents in lumber? The answer comes down to the cellular structure of wood and the math behind surface area. Wood is not a solid, uniform mass like plastic. It is an organized bundle of hollow cellulose tubes running parallel to each other, similar to a dense handful of drinking straws. When you press firmly against the ends of the straws, they can bear a surprising amount of weight. When you press down against their sides, however, the hollow walls fold and collapse under relatively low loads.
Most standard F-style clamps and parallel jaw clamps feature steel faces that measure roughly one inch wide by two inches tall. When you crank down a heavy lead screw to seat a stubborn joint, you might easily exert 300 to 600 pounds of force. If that load is applied across a contact area of just two square inches, the localized pressure reaches 150 to 300 pounds per square inch. For dense species like hard maple or white oak, the surface can occasionally withstand this force without visible damage. But for softer species like pine, alder, walnut, or cherry, that level of concentrated pressure crushes the outer fibers beyond their elastic limit.
When wood cells collapse mechanically, they cannot easily spring back into position. While swelling the wood with hot water or steam from a clothes iron can sometimes lift shallow depressions by plumping up the dried fibers, deep crushed pockets often remain visible under an oil or lacquer finish. Furthermore, bare iron jaws react chemically with the moisture in water-based polyvinyl acetate (PVA) glue and the natural tannins in woods like oak and walnut. This interaction causes dark, black chemical staining that penetrates well below the surface, forcing you to plane or scrape away precious thickness just to restore the natural color.
Making reusable scrap wood cauls for clamp heads
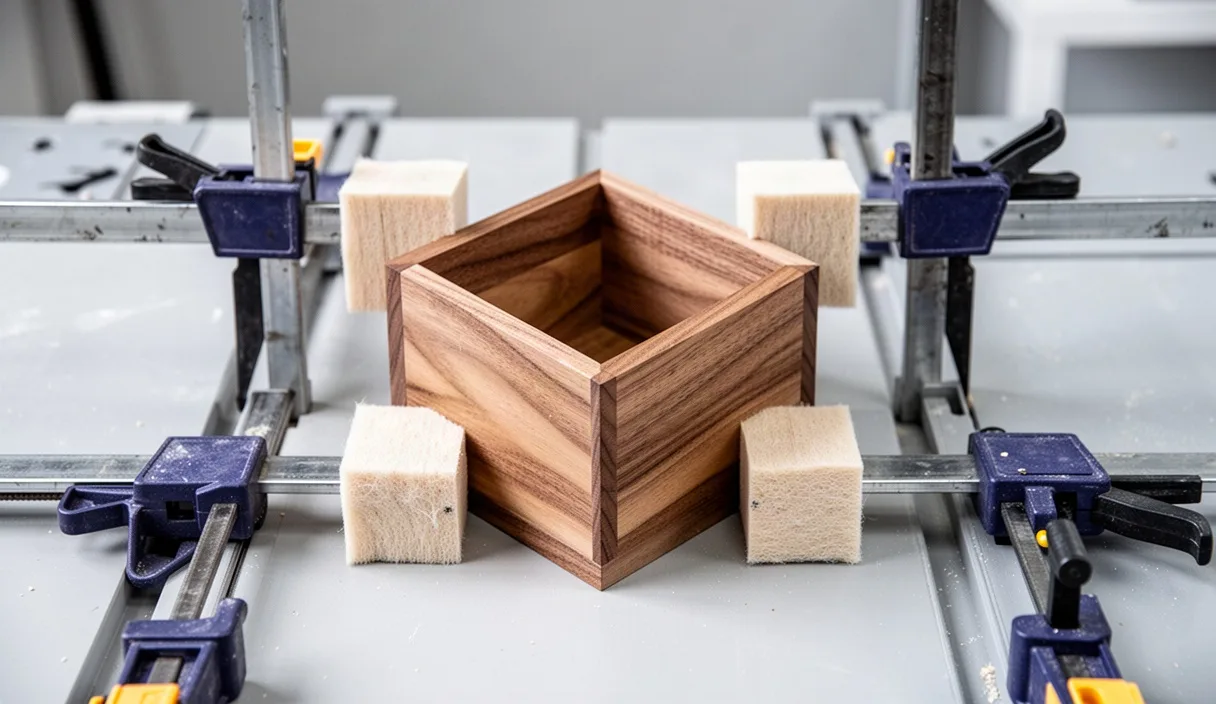
A caul is simply an intermediate block placed between the clamp jaw and the actual workpiece. What does a caul do that makes it so valuable? It takes the extreme, pinpoint pressure of the clamp head and spreads that load across a broader footprint. Instead of focusing hundreds of pounds onto a two-square-inch footprint, a caul distributes that same force across six, eight, or twelve square inches. This simple change drops the pressure per square inch down to a level that the wood grain can support without bruising.
To make durable, reusable cauls, dig through your scrap bin for offcuts of medium-density fiberboard (MDF) or straight-grained hardwood scraps like beech, birch, or poplar. Avoid using scraps of pine or fir for the cauls themselves, because very soft cauls can cup or split under heavy clamping loads, transferring uneven pressure to your project. Cut your scraps into matching rectangles roughly three-quarters of an inch thick, two inches wide, and four to six inches long. The extra length allows the caul to bridge across the entire corner of the box joint, ensuring the pressure seats the joint evenly along its entire seam.
| Caul Material | Surface Hardness | Best Application | Durability |
|---|---|---|---|
| Hardwood scrap (Maple, Beech) | High | Heavy joint closing, large case work | Long service life |
| MDF offcuts | Medium | General box assemblies, flat panels | Medium (edges can fray) |
| Cork-faced plywood | Soft contact face | Pre-sanded boxes, thin veneer work | High (pads can be replaced) |
| Dense closed-cell foam pads | Very soft contact face | Irregular profiles, curved lids | Low (crushes after repeated use) |
To make these blocks even safer for finished wood surfaces, glue a thin layer of natural cork or thick vegetable-tanned leather to one face using contact cement. Cork has high friction, which stops the caul from slipping out of place while you tighten the screw, yet it yields slightly under pressure to conform to minor surface imperfections without denting the box. Finally, apply a strip of clear packing tape across the outer face of the caul. Polyvinyl acetate glue will not adhere to the smooth plastic backing of packing tape, ensuring that any adhesive oozing from the joint will not permanently bond your protective block to the project.
Using band clamps for four-sided box assemblies
What happens when you try to clamp a four-cornered box using traditional bar clamps? You quickly find yourself wrestling with a tangled web of heavy steel bars. You need two clamps pulling in one direction, two more pulling across them in the opposite direction, and extra pads under every single jaw. The weight of the metal bars alone can tip a light box off the assembly bench, and the overlapping clamps make it awkward to check whether the box is sitting flat on your workbench. Band clamps, also known as strap clamps, solve this mechanical puzzle by applying pressure from a single continuous loop.
A band clamp uses a high-strength nylon or polyester strap that wraps around the entire perimeter of the assembly. As you crank the internal ratchet or screw mechanism, the strap shortens, pulling all four corners toward the center at the exact same moment. Because the strap pulls uniformly in all directions, it mimics the action of pulling a drawstring tight around a pouch. This equalized tension closes all four joints simultaneously without applying asymmetric loads that twist the box into a parallelogram.
To use a band clamp without marring the corners, follow this routine:
- Inspect the plastic corner brackets that thread onto the strap. Ensure they are free of dried glue, grit, or sharp molding ridges from the manufacturing process.
- Cut four small pieces of heavy craft paper, waxed paper, or thin cardboard folded into right angles, and set one under each plastic corner bracket to prevent plastic-on-wood burnishing.
- Dry-fit the box without glue first. Position the strap around the center of the box sides, taking care that the nylon webbing runs straight and parallel to the top and bottom edges.
- Thread the strap through the tensioning lock, pull the slack through by hand, and turn the tightening handle just until the corner brackets seat firmly on the joints.
- Sight down the walls to make sure the strap tension has not bowed the sides inward. A band clamp should be snug enough to close the joinery, but not so tight that it flexes the wood inward between the corners.
Measuring diagonal corners to check for squareness
A box can have tightly closed joints and still be completely out of square. If the opposite sides are identical in length, the assembly forms an equilateral parallelogram, meaning two opposing corners will be sharper than ninety degrees, while the other two will be wider. Clamp pressure applied only to the faces will not correct this condition. The most reliable, objective way to verify that your assembly is truly rectangular is to measure between diagonally opposite corners.
This technique relies on the fundamental geometry of rectangles: when opposing sides are equal in length, the two diagonal measurements through the center will be identical only when all four interior angles sit at exactly ninety degrees. Place the hook of a tape measure or the tip of a rigid wooden rule against the inside intersection of the top-left and bottom-right corners. Note the measurement down to the nearest thirty-second of an inch. Then, transfer the rule to measure the distance between the top-right and bottom-left corners.
If the first diagonal measures 14 and 3/8 inches and the second diagonal measures 14 and 5/8 inches, the box is out of square by a quarter of an inch. The longer diagonal points you directly toward the problem: that corner is stretched out too far. To correct the shape before the glue sets, place an F-clamp across the points of the longer diagonal. By applying moderate pressure along that extended line, you compress the long axis, which automatically pushes the shorter axis outward. Tighten the diagonal clamp slowly, rechecking both measurements every half-turn, until both diagonal dimensions match precisely.
Removing glue squeeze-out before clamping cauls stick
Wood glue needs to squeeze out of a joint to prove that enough adhesive was applied to cover the entire mating surface. However, that liquid bead creates two immediate hazards: it can weld your wooden cauls directly to the box, and it can leave rubbery rings on the wood that seal the pores against stains and finishes. Dealing with squeeze-out requires calculated timing rather than frantic scrubbing.
Many woodworkers make the mistake of grabbing a wet rag or damp sponge the moment the clamps are tightened, vigorously scrubbing down the corner. This is one of the worst actions you can take. Water thins the liquid PVA glue, driving diluted adhesive deep into the open pores of the surrounding dry wood. Even though the surface looks clean while wet, that diluted glue dries into an invisible barrier. When you apply an oil finish or stain days later, pale, blotchy halos will appear along the joints where the finish cannot penetrate the sealed grain.
Instead of wiping wet glue, let the adhesive sit untouched for 20 to 30 minutes until it enters its intermediate gel state. In this rubbery phase, the glue has lost its liquid stickiness but has not yet turned rock-hard. Take a sharp, flexible cabinet scraper, a narrow chisel held flat against the wood, or even a modified plastic drinking straw cut at a 45-degree angle, and slide the edge gently along the joint line. The semi-cured glue will peel away in clean, coherent ribbons without smearing across the adjacent face.
If your clamp cauls must sit directly over an open joint line where squeeze-out is guaranteed, prepare the cauls ahead of time with a physical barrier:
- Line the interior face of the cauls with heavy-duty wax paper, which peels away effortlessly once the adhesive support.
- Apply polyimide or polyethylene packing tape over the contact areas of the caul, as wood glue forms no chemical bond with these plastics.
- Rub a soft block of paraffin wax directly onto the caul face to create an oily, non-stick surface that repels water-based glues.
Common clamping mistakes
Even with good cauls and proper clamps, subtle mistakes during assembly can ruin an otherwise accurate build. Recognizing these oversights beforehand saves you from frantic corrections while the glue is actively setting.
The most frequent error is over-tightening. Clamps are designed to hold pieces in intimate contact while glue forms its chemical bond, not to bend warped parts into unnatural submission. When you apply excessive torque to a clamp handle, you squeeze out all the glue from the joint line, creating a starved joint that is physically weak. At the same time, the extreme pressure will either dent your wood past the protective limits of your cauls or bow the middle of the box boards inward.
Another common mistake is clamping an assembly while it rests on an uneven workbench. If your assembly table has a twist or sag, the downward weight of heavy steel clamps will pull the flexible box down to match the contour of the bench. Once the glue dries, that twist becomes permanently locked into the frame, meaning your box will wobble diagonally on any flat tabletop. Always support your box on a pair of flat, parallel wooden winding sticks or an auxiliary piece of flat Baltic birch plywood during glue-up.
Finally, avoid skipping the dry run. Attempting a glue-up without first assembling the entire box with clamps and cauls, but without glue, is an invitation to damage. A dry run reveals whether your cauls slip out of alignment, whether the band clamp is tangled, and whether your diagonals are square. If you discover a problem while the wood is dry, you have all the time in the world to reposition a caul or trim a joint. Once the glue is spread, you have only about ten minutes of open working time before the adhesive begins to seize.
Practical next steps for clean glue-ups
To prepare your workspace for clean, dent-free box assemblies, begin by setting aside an hour to build a dedicated clamping kit. Mill half a dozen pairs of cauls from scrap hardwood or stable plywood, making them in two-inch, four-inch, and six-inch lengths to suit different box heights. Face one side of each caul with thin cork or leather, cover the opposing face with high-tack clear packing tape, and store them in an open bin directly beside your clamping rack so they are always at hand.
Before your next assembly, inspect the edges of your joint components under a raking work light. Sand the interior surfaces of the box completely up to 180 or 220 grit, because cleaning up inside corners once the box is glued together is exceptionally difficult and frequently leads to scraper gouges. Wipe down all parts with a clean, dry microfiber cloth to remove stray sawdust that could act as an abrasive under caul pressure, and lay out your clamps, cauls, tape measure, and square within arm's reach of your assembly board.