
A sharp wood chisel does not cut by brute force. Instead, it operates like an ultra-thin wedge that severs wood fibers cleanly along their cell walls. When a chisel is dull, it acts less like a knife and more like an axe head, crushing and bruising the wood grain before it tears the shavings free. If you have ever tried to slice a soft, ripe tomato with a blunt kitchen knife, you know the frustration: the skin dents, the fruit collapses, and juice spills everywhere before the blade finally bites. In the workshop, a dull blade produces that same ragged, crushed surface on pine or oak, making crisp joinery impossible.
Many woodworkers assume that sharpening requires costly waterstones, diamond plates, or high-speed powered grinders. While those tools certainly work, you can achieve an edge that shaves hair and pares end-grain pine using sheets of specialized sandpaper mounted on a flat surface. Woodworkers often call this the scary sharp method, named simply for how surprisingly keen the resulting edge turns out to be. It is an accessible, budget-friendly technique that teaches you the fundamental mechanics of metal removal and edge geometry without requiring a major upfront investment.
Why flat reference surfaces matter for keen cutting edges
What actually makes an edge sharp? At its core, a sharp edge is simply the intersection of two smooth, flat surfaces meeting at an acute angle. The narrower the radius where those two planes meet, the sharper the tool feels and cuts. If either of those surfaces is scratched, pitted, or rounded like the edge of a worn coin, the intersection will be blunt. A sharp chisel requires two specific planes: the flat back (also known as the face) and the angled bevel at the front.
When you register a chisel against a piece of wood to pare down a tenon or clean the bottom of a mortise, the back of the blade acts as an extension of your work surface. If the back is bowed or twisted, the tool will dive unexpectedly into the cut or ride out of the wood altogether. Think of it like trying to draw a straight line with a ruler that has a curved, warped edge. No matter how steady your hand is, the line follows the curve of the tool. Flattening the back creates an absolute geometric reference, ensuring that your chisel tracks where you aim it.
The second reason for absolute flatness involves the physics of the cutting apex. When two flat planes cross, they form a straight, unbroken line. When two undulating, bumpy surfaces cross, they touch only at high spots, leaving tiny gaps and tears along the edge. Polishing both the back and the bevel removes these microscopic hills and valleys, leaving a continuous line of steel that requires minimal hand pressure to slice through dense hardwoods.
Setting up float glass and adhesive abrasive sheets
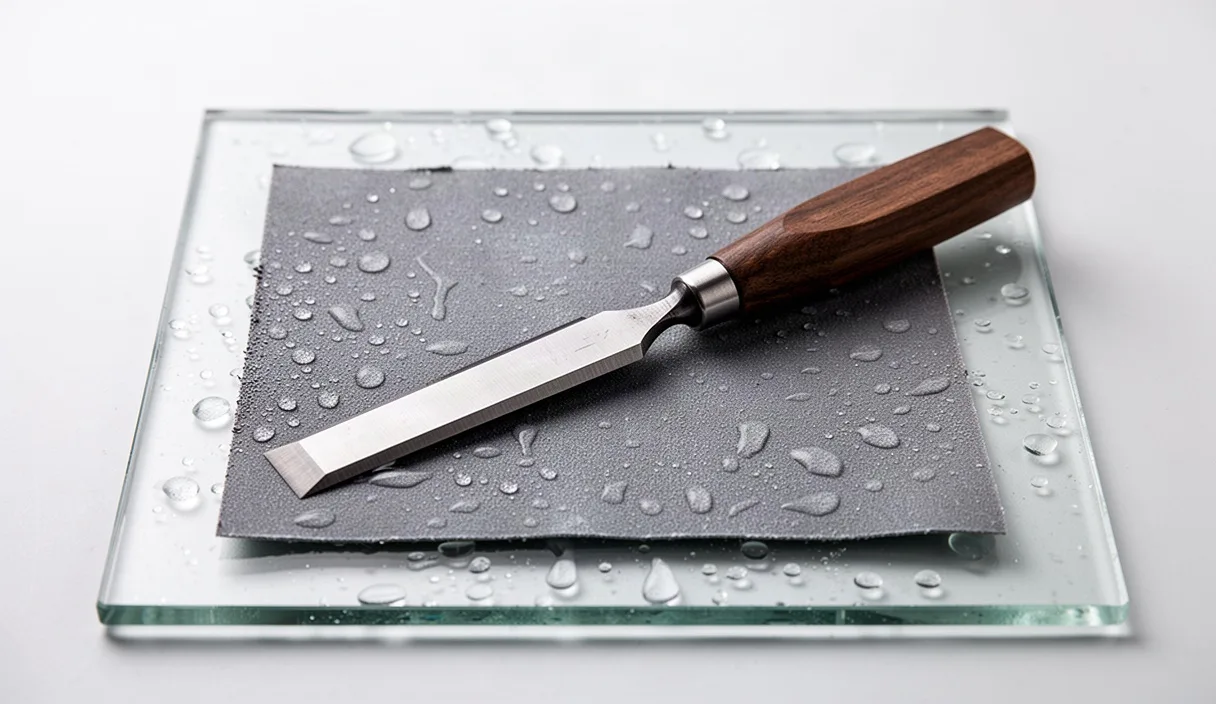
To create a flat surface on steel, you must rub it against an abrasive that rests on an even flatter substrate. Float glass is the standard choice for this system. Float glass gets its name from how modern manufacturers produce it: by pouring molten glass onto a bath of molten tin. Gravity and surface tension spread the liquid glass out into an exceptionally flat ribbon. A piece of quarter-inch (6 mm) or three-eighths-inch (10 mm) thick float glass provides a rigid, unyielding base that will not flex when you lean your body weight into a stroke. Granite surface plates or offcuts of polished granite countertop also work well.
Once you have your flat substrate, you need abrasives that stay completely stationary. If sandpaper wrinkles or bunches up under the blade, it will roll around the edge of the tool, rounding off the very corner you are trying to make crisp. You can use sheets coated with pressure-sensitive adhesive (often labeled PSA paper) or standard wet-or-dry silicon carbide sheets secured with a light mist of repositionable aerosol adhesive. Silicon carbide is ideal because its particles fracture under pressure, creating fresh, sharp cutting facets as you work rather than simply dulling into smooth nubs.
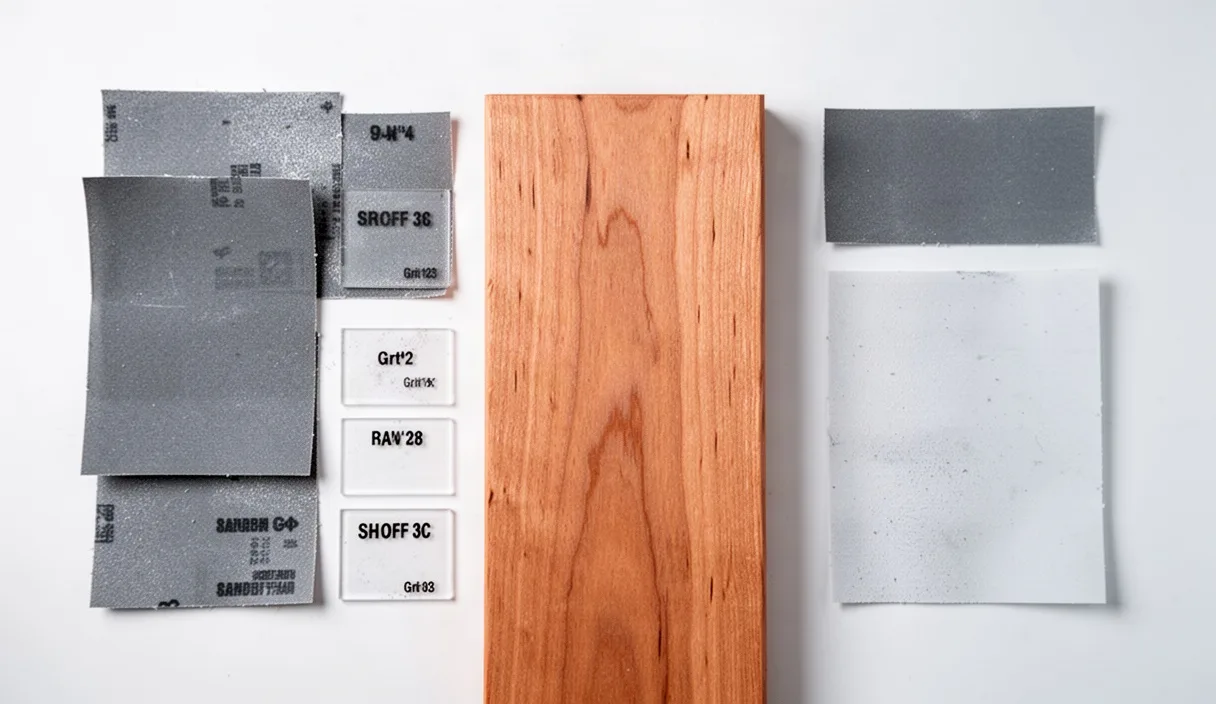
A sensible abrasive sequence moves from coarse grit to reshape the metal down to ultra-fine particles to polish it. You can measure abrasive paper using standard grit ratings or micron ratings, where a lower micron number means a finer grain size. The following progression offers a dependable path from a rough factory grind to a mirror polish.
| Abrasive Grade | Approximate Micron Size | Primary Function in Sharpening |
|---|---|---|
| 220 Grit | 68 Microns | Removes factory milling marks and corrects out-of-flat backs. |
| 400 Grit | 35 Microns | Erases coarse 220-grit scratches and establishes primary bevel shape. |
| 800 Grit | 22 Microns | Refines the scratch pattern and prepares the surface for polishing. |
| 1500 Grit | 12 Microns | Transitions metal from a satin finish to a reflective surface. |
| 2500 Grit | 8 Microns | Creates a mirror polish and refines the cutting apex to a razor line. |
Affix the paper sheets in a neat row across your glass plate, leaving an inch of bare glass between each sheet. Lubrication helps clear away loose metal swarf (the fine steel dust produced during grinding) so the paper does not clog. Plain water with a drop of liquid dish soap works well, as does mineral oil or odorless mineral spirits. Mineral spirits offer an added benefit: they evaporate cleanly and will not cause cast steel to rust if you step away from your bench for an hour.
Flattening and polishing the chisel back first
Why must you flatten the back before touching the bevel? Because sharpening the bevel creates a burr on the back. If the back is rough or hollowed, you cannot cleanly remove that burr later without blunting your new edge. Fortunately, you only need to flatten the first two to three inches of the chisel back closest to the cutting tip. The rest of the blade never touches the wood during precision cuts, so spending hours polishing the entire length of the blade wastes time and abrasive paper.
Begin by checking where the blade actually touches the glass. Take a permanent marker and draw a tight crosshatch grid across the first two inches of the chisel back. Place the blade flat on your coarsest sheet, typically 220 grit. Keep your fingers spread evenly across the back of the blade, pressing downward with moderate, steady force. Push and pull the chisel lengthwise along the abrasive sheet for roughly twenty strokes. Pick up the tool and look at the ink.
If the ink has worn away evenly across the entire width of the tip, your chisel is already flat. More often, you will see ink remaining in the center (meaning the back is slightly hollow) or along the edges (meaning the back has a belly). Continue working on the 220-grit paper until the ink wears off uniformly from edge to edge across the first inch of the blade. Add a few drops of lubricant regularly to float the steel swarf away from the cutting particles.
Once you establish a flat surface across the width of the tool on the coarsest grit, clean the blade thoroughly with a rag. Moving from one grit to the next without wiping the blade transfers large abrasive particles onto your finer sheets, gouging deep scratches into an otherwise polished surface. Advance through each sheet in order: 400, 800, 1500, and 2500 grit. Spend about thirty to forty strokes on each grade. You do not need to push hard; let the abrasive do the cutting. By the time you finish the 2500-grit sheet, the back of your chisel should reflect light like a bathroom mirror, showing no distinct directional scratch lines.
Honing the primary bevel at twenty-five degrees
With the back flat and mirror-bright, you can turn your attention to the angled front of the tool. Most bench chisels perform best with a primary bevel ground at twenty-five degrees. This angle strikes a practical balance: it is thin enough to penetrate wood fibers with light hand pressure, yet thick enough to support the cutting edge so the steel does not chip or fold when striking a knot in pine or paring tough white oak.
While experienced woodworkers sometimes hone freehand, using an inexpensive roller honing guide guarantees consistent angles. A honing guide clamps the chisel in place and uses a small wheel to roll across the sharpening surface. The angle of the bevel is determined simply by how far the blade projects out from the front of the guide. For most standard clamping guides, extending the chisel blade out by forty millimeters yields a precise twenty-five-degree bevel. Measure this projection with a simple wooden gauge block or a small steel ruler, and tighten the clamp screws firmly so the blade cannot shift diagonally under pressure.
Apply several drops of lubricant to your 400-grit sheet. Place the roller of the guide on the glass and tilt the assembly forward until the factory bevel rests completely flat on the sandpaper. Move the guide forward and backward across the sheet in straight, controlled strokes. Keep your downward pressure centered directly over the cutting bevel, not on the guide roller. If you press too hard on the roller, the tool will lift slightly, altering your sharpening angle.
How do you know when you have honed enough on a particular grit? You must feel for a burr, also known as a wire edge. As the abrasive cuts away steel from the bevel face, it pushes an extremely thin foil of excess metal over the tip and onto the flat back. To check for this burr, lift the chisel, turn it over, and gently slide your thumb pad from the back toward the edge, moving off the tip of the tool. Never run your finger parallel to the blade. If you feel a distinct, rough catch all the way across the width of the edge, you have successfully ground through the old dull apex. Once the burr runs continuously from corner to corner, wipe the tool clean and repeat the process on the 800, 1500, and 2500-grit papers.
Optional micro-bevel technique
If you want to speed up future sharpenings, you can add a micro-bevel, sometimes called a secondary bevel. After establishing your primary bevel at twenty-five degrees, retract the chisel slightly into the honing guide so it projects thirty millimeters instead of forty. This shifts the honing angle to thirty degrees. Now, only the very tip of the blade touches the paper. By polishing only a tiny strip of metal at the tip rather than the entire broad bevel face, you can hone your tool in ten strokes instead of fifty. A micro-bevel adds durable backing support right behind the cutting edge without altering how the chisel tracks inside a joint.
Removing the final wire edge burr with high-grit paper
After polishing the bevel through your finest paper, the chisel may look finished, but it is not yet ready to cut wood cleanly. That microscopic foil of metal you felt earlier, the wire edge, is still clinging to the tip. If you try to chop dovetails with the burr intact, the first hard strike into wood will snap the burr off unpredictably, leaving a jagged, fractured edge that dulls within minutes.
Removing the wire edge requires alternating light strokes between the back and the bevel. Remove the chisel from the honing guide. Place the polished back perfectly flat on your finest sheet of paper, the 2500-grit or an ultra-fine 3000-grit sheet. Press down firmly with your fingers along the blade so the back cannot tilt, and pull the tool backward three or four times. This action stands the burr straight up or breaks off the largest portions of it.
Next, pick up the blade and set the bevel on the paper at its honing angle. Make one or two gentle, pulling strokes. Flip the blade over and repeat the flat pull on the back. With each cycle, reduce your hand pressure. You are no longer trying to grind metal away; you are fatiguing a microscopic hinge of steel until it falls away cleanly, leaving two flawless planes meeting at an unbroken line.
To finish the process, many woodworkers pull the blade across a piece of vegetable-tanned leather charged with a fine buffing compound, such as chromium oxide green paste. Stropping the back and bevel five times on each side polishes away any lingering trace of the wire edge. When finished, test the sharpness by gently shaving the hair on your forearm or paring paper-thin, translucent shavings across the end-grain of a scrap piece of soft pine. If the edge catches without crushing the wood cells, your chisel is ready for joinery.
Common mistakes
Most sharpening failures stem from subtle errors in pressure, cleanliness, or angle control. Watch for these regular workshop issues:
- Rocking the blade during freehand strokes: Tilting your wrists while moving the chisel back and forth rounds over the bevel. Use a honing guide until your muscle memory can maintain a rigid, lock-wrist motion.
- Skipping abrasive grits too quickly: Fine grits are designed to polish, not reshape. If you leave heavy 220-grit scratches behind because you moved to 1500 grit too soon, those deep furrows will remain at the cutting tip, creating microscopic serrations that dull rapidly.
- Lifting the back off the glass: When polishing the flat back, keep the blade completely flush with the surface. If you lift the handle even a millimeter, you create a back-bevel. A chisel with a back-bevel cannot pare flat surfaces accurately.
- Allowing swarf to build up on the paper: Dry steel filings bunch together into tiny clumps that roll under the edge, leaving deep, stray gouges in polished metal. Use generous lubricant and wipe the abrasive clean with a wet paper towel frequently.
Putting your edge to work: practical next steps
Sharpening is not an isolated task reserved for the start of a project; it is a routine habit woven into woodworking. A truly keen edge begins to degrade after twenty to thirty minutes of hard chopping in oak or maple. Instead of waiting until the tool is painfully blunt and forced to restart on coarse paper, keep your glass plate and fine abrasives set up near your workbench. A thirty-second touch-up on the 2500-grit paper and a quick pass on a leather strop every few joints will maintain that peak razor edge all day.
To keep your tools cutting smoothly, consider taking these direct steps next:
- Source a scrap piece of heavy float glass or polished stone at least twelve inches long and six inches wide. Check local glass shops for thick shelf cutoffs, which are often sold cheaply or given away as scrap.
- Inspect your current chisels for damage. If an edge has a deep nick from striking a hidden screw or dropping onto a concrete shop floor, grind out the nick first on a slow-speed wet wheel or use dedicated 80-grit paper before starting your standard flattening sequence.
- Build a simple wooden projection jig for your honing guide. By gluing a small wooden stop block thirty millimeters and forty millimeters away from a reference fence, you can set your sharpening angles in two seconds without reaching for a ruler every time you hone.
- Store your sharpened chisels in a canvas tool roll or a dedicated wooden rack. Never toss bare chisels into a metal toolbox where their freshly honed tips can collide with screwdrivers, files, or other blades.