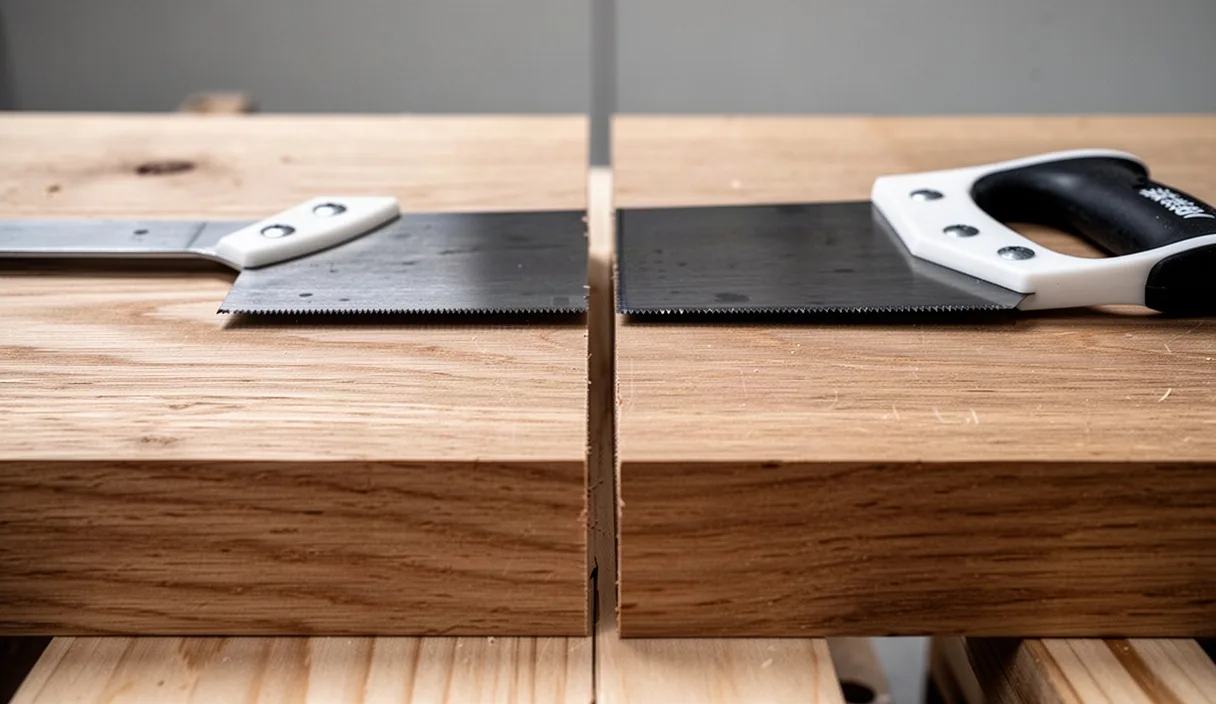

You draw a clean pencil line across an oak board, set the teeth of your hand saw directly beside it, and begin your cut with steady strokes. For the first inch, everything follows your mark. By the time you reach the midpoint of the board, the blade has drifted away from the line, angling out into the waste wood or carving inward toward your finished dimension. When you pull the saw free and look at the end grain, the cut face is sloped rather than vertical. Why does a flat sheet of hardened steel refuse to travel in a straight line?
A hand saw is not a rigid chisel that cuts by brute force. It is a flexible steel ribbon stretched across a frame or supported by a reinforced spine, designed to track within a channel created by its own teeth. When a saw wanders, it rarely does so at random. Drift happens because of an imbalance in physical forces, either within the metal itself or within the body of the person pushing it. Understanding how a saw functions mechanically makes it possible to diagnose exactly why your tool leaves its path and how to correct it before you ruin valuable lumber.
The anatomy of a saw kerf and tooth set
To understand why a blade wanders, you first need to examine the empty space it leaves behind. When a saw cuts through wood, it removes wood fibers to create a narrow channel called a kerf. If the teeth were ground completely flat and aligned directly with the saw plate, which is the flat body of the blade, the steel would instantly bind against the wood fibers. Moisture and internal tension in timber cause the cut to close slightly as you work. To prevent this friction, the teeth are deliberately bent outward in alternating directions: one tooth leans slightly to the left, and the next tooth leans to the right.
This alternating bend is called tooth set. Think of a snowplow with a blade wider than the truck pushing it. The wide plow clears a generous path so the truck tires can roll freely through the snow without dragging against the banks. In woodworking, the set of the teeth carves a kerf that is slightly wider than the saw plate itself. A Western handsaw might have a steel plate that measures 0.032 inches thick, while the alternating teeth clear a path measuring 0.044 inches wide. This leaves roughly 0.006 inches of clearance on either side of the steel plate.
What happens if that clearance disappears or becomes uneven? The steel plate begins to rub against the wood walls. If the teeth are set too wide, the saw chatters and wanders because the blade has too much room to tilt inside the channel. If the teeth have too little set, friction mounts, the blade heats up, and the steel buckles under the forward push. Balancing plate thickness and tooth set is critical for maintaining an accurate cut.
| Saw Type | Plate Thickness | Total Set (Both Sides) | Total Kerf Width |
|---|---|---|---|
| Dovetail Saw (20 TPI) | 0.020 inches | 0.006 inches | 0.026 inches |
| Tenon Saw (13 TPI) | 0.030 inches | 0.010 inches | 0.040 inches |
| Panel Saw (8 TPI) | 0.035 inches | 0.016 inches | 0.051 inches |
How asymmetric tooth wear pulls the blade off line
What happens when the teeth on one side of the saw are sharper or bent farther outward than the teeth on the other side? The saw turns, exactly like a canoe paddled only on the port side. Each tooth acts as a miniature knife blade. If the teeth bent toward the right are sharper or have a few thousandths of an inch more set than the teeth on the left, the right-side teeth sever and clear more wood per stroke. The blade naturally drifts toward the path of least resistance, curving in the direction of the more aggressive cut.
This imbalance often develops through accidental contact with metal or abrasive materials. If you graze a steel bench dog, cut through an old embedded nail, or lay your saw down on a grit-covered concrete workbench, you can dull the delicate tips of the teeth on one side in a fraction of a second. The dull teeth cannot bite into the fibers as deeply as their sharp partners. As you push forward, the sharp side cuts freely, while the dull side rubs and pushes against the cut wall, deflecting the flexible plate toward the dull side or steering it hard toward the sharp side.
You can identify uneven set by sighting down the tooth line toward a bright light source. The tips of the teeth should form two parallel, uniform rows of light reflections. If one side shows a wider flare of reflected light, or if you spot individual teeth sticking out past their neighbors, the set is uneven. Correcting this condition requires jointing the sides of the teeth with an oilstone, a process called stoning. By running a fine stone lightly down the side of the tooth line, you knock back the over-extended teeth until both sides match in width, restoring straight-line balance.
Body position: lining up your forearm, elbow, and eye
Saw drift is not always the fault of the steel. In many workshops, the tool is balanced, but the human motor running it is crooked. The human arm is a series of interconnected hinges: the shoulder rotates in a socket, the elbow opens in a single plane, and the wrist moves in multiple directions. If these three joints do not line up parallel with the saw plate, your arm will push the saw sideways at the end of every forward stroke.
Think of shooting a target bow or throwing a dart. You would not position your elbow out at a wide angle while trying to sight down the center of the target. Your eye, your drawing hand, and your forearm must occupy the same vertical plane. When sawing, the same rule applies. Your dominant eye should be positioned directly above the cut line. Your shoulder, elbow, wrist, and the blade of the saw must move within that single plumb line.
To test and correct your physical stance, set up your work using these mechanical checkpoints:
- Stance orientation: Stand with your feet roughly shoulder-width apart. If you saw with your right hand, place your left foot forward, pointing toward the bench, and angle your right foot outward at roughly forty-five degrees to brace your weight.
- Torso clearance: Turn your torso slightly away from the bench so your right arm has completely open air to swing back and forth without brushing against your ribs. If your hip or shirt touches your elbow during the stroke, your arm will twist, tilting the blade.
- The line of sight: Lean forward from your hips so your nose and dominant eye sit directly over the kerf. If you stand too far to the side, parallax error will cause you to see the blade as plumb when it is actually leaning two or three degrees.
- Pistol grip extension: Grasp the saw handle with your three lower fingers, but extend your index finger forward along the wooden cheek of the handle. Pointing your finger along the blade mirrors how your brain naturally points toward an object, helping your wrist lock into alignment automatically.
Letting the weight of the saw do the cutting work
Why do woodworkers squeeze the saw handle so tightly when a cut goes wrong? Frustration causes tension, and tension makes hands clench. When you apply heavy downward muscle force to a handsaw, you cause the thin steel plate to buckle. Steel is exceptionally strong in tension, which means it resists being pulled. But thin steel is weak in compression. When you push hard down and forward at the same time, the teeth bite aggressively into the wood, catching on the fibers. The forward thrust of your hand then causes the thin plate behind the teeth to flex outward into an arc.
Once a saw plate bows inside the wood, it cannot cut straight. The middle of the blade bulges sideways, scraping against the kerf walls and dragging the cut off line. You can picture this by trying to push a flexible plastic ruler across a rough tabletop. If you press down on the trailing edge while shoving it forward, the middle bends upward or sideways instantly. If you hold it lightly and draw it along, it remains flat.
The solution requires relaxing your grip pressure dramatically. Hold the saw handle as gently as you would hold a small songbird: firm enough that it does not slip from your fingers, but soft enough that you do not crush it. The weight of the saw itself, especially in a heavy-backed joinery saw with a brass or steel spine, provides all the downward pressure required for the teeth to sever the wood fibers. Your only job is to provide the back-and-forth reciprocating motion. When you stop bearing down, the steel relaxes, stays dead flat in the cut, and follows its established track.
Using a magnetic guide block to practice true ninety-degree cuts
Muscle memory takes time to train. If your body has spent years sawing with an angled wrist or a flared elbow, cutting straight will initially feel unnatural. You can calibrate your muscles by building a magnetic guide block. This simple workshop appliance acts as a physical fence, holding the saw plate perpendicular to the timber while your body learns what a truly straight stroke feels like.
You can make a guide block from a scrap of dense hardwood, such as maple or beech, measuring roughly two inches thick, three inches wide, and four inches long. Surface the block so that at least two adjacent faces meet at a dependable ninety-degree angle, verified with a reliable try square. Using a Forstner bit, drill two shallow, flat-bottomed recesses into the vertical working face. Press small, circular neodymium magnets into these holes so they sit flush or just a hair below the wooden surface, securing them with a dab of epoxy.
Cover the wood and magnet face with a strip of low-friction adhesive tape, such as ultra-high-molecular-weight polyethylene tape or smooth packing tape. This barrier prevents the steel saw plate from rubbing directly against the wood or scratching against the metal magnets. Clamp the guide block directly to your workpiece, aligning its edge precisely with your cut line.
Place your saw plate flat against the taped surface of the block. The internal magnets will pull the steel blade firmly against the true ninety-degree face. As you begin sawing, the magnets keep the saw dead vertical, preventing any lateral wandering. Do not rely on the block forever; use it for three or four cuts on scrap wood at the start of each shop session. Pay close attention to how your elbow swings and how your wrist feels while the saw is held strictly upright. After several practice pieces, remove the block and attempt the cut freehand, matching the exact physical sensation the guide provided.
Common mistakes that cause drift
When diagnosing why a saw leaves its line, check for these straightforward mechanical and behavioral errors:
- Starting the cut with a shove: Pushing down hard on the forward stroke to begin a cut tears wood fibers haphazardly and kicks the blade off the mark. Always start with light, backward pull strokes to establish a shallow, clean groove before pushing forward.
- Looking at the wrong side of the line: Splitting a pencil line down the center is difficult. Instead, align your teeth in the waste wood directly adjacent to the pencil line, leaving half the graphite mark visible on your finished piece. Watch that sliver of graphite, not the saw plate.
- Using the wrong pitch: Pitch refers to the number of teeth per inch (TPI). Using a fine dovetail saw with sixteen teeth per inch to rip down a two-inch-thick plank will quickly clog the small spaces between teeth (gullets) with sawdust. Once the gullets pack full, the teeth stop clearing material, and the blade slips sideways.
- Twisting at the bottom of the stroke: Many woodworkers inadvertently rotate their wrist clockwise at the very bottom of the stroke as their arm straightens. Keep your wrist locked in neutral until the blade comes to a full stop.
Putting straight sawing into practice
Straight cuts do not come from buying expensive tools or exerting heavy effort. They come from eliminating mechanical friction and aligning your body with the geometry of the blade. If your saw continuously wanders to the right or left, stop working on your primary project and run a systematic diagnostic check. First, inspect the blade itself for uneven set, bent teeth, or plate distortion. If the steel is true, turn your attention to your stance, your grip pressure, and your line of sight.
Take a square-edged piece of scrap lumber and mark three lines across the face and down both edges using a marking knife or a sharp pencil. Make your first cut using a very light grip, paying strict attention to keeping your elbow in line with the kerf. Check the result with a square. If drift persists, attach a magnetic guide block to force the blade into compliance for the next cut, observing how your arm must adjust to match the tool. Developing an accurate cut takes deliberate, mindful repetition, but once your hands and eyes learn the geometry of the saw kerf, your cuts will consistently follow your marks from start to finish.