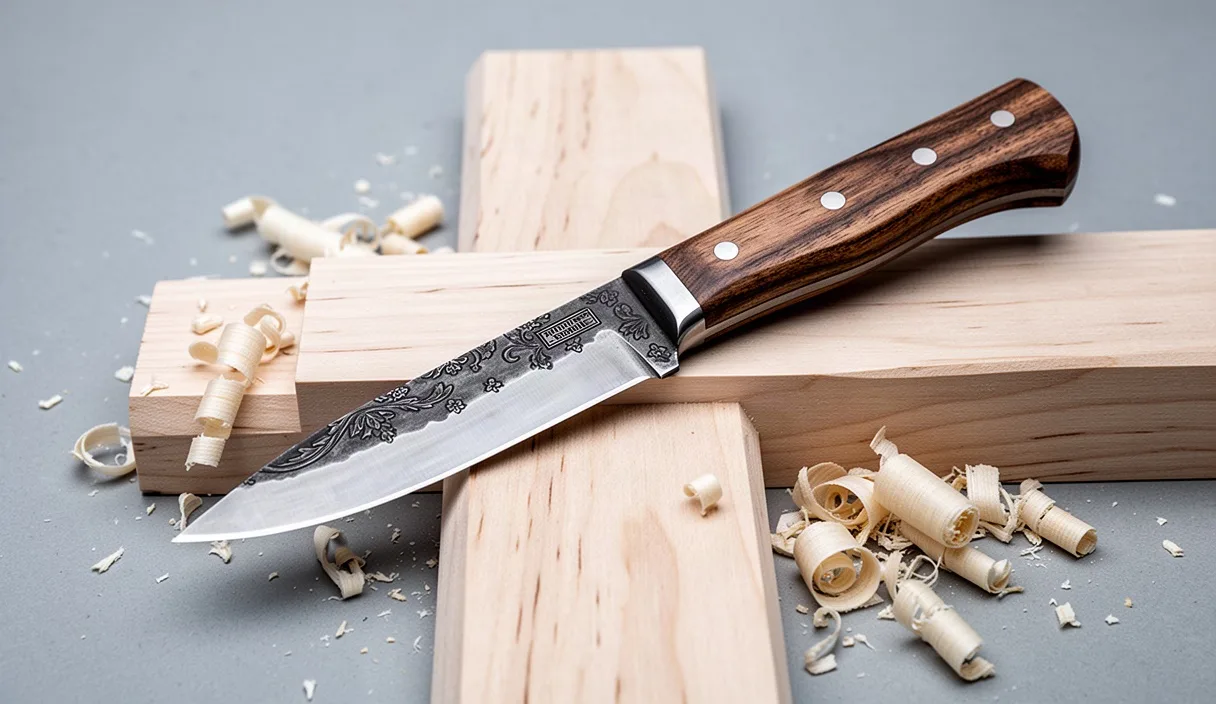

Whittling begins with a simple urge to turn a stray stick into an object with shape, balance, and clean lines. Many carvers start on a back porch or around a camp table, picking up an old utility blade or a folding pocket knife that happens to be in a drawer. Within twenty minutes, the work stops. The fingers feel bruised, the wrist aches, and the cuts in the wood look chewed rather than sliced. Wood seems stubborn, but the true culprit is almost always the geometry of the tool in your hand.
A whittling knife is not an all-purpose pocket tool. It does not need to open cardboard boxes, cut cordage, or scrape gaskets. Its sole job is to enter dry, fibrous wood cleanly, sever the grain with minimal resistance, and sit comfortably in your palm while you apply pressure for hours at a time. Choosing your first carving tool is about understanding how mechanical leverage, steel composition, and handle ergonomics work together. When those three factors match your hands, carving feels less like a struggle against the material and more like shaping firm butter.
Why pocket knives often tire your hand during carving
Why does a standard folding knife make your palm ache after only a few cuts? The answer lies in how pocket knives are designed. Everyday carry folders prioritize compactness in your pocket over comfort in your grip. Their handles are often thin, flat slabs of textured plastic, aluminum, or steel. When you bear down to make a slicing cut through basswood, all of that cutting force concentrates along the narrow edges of the frame. Your skin and the small nerves in your palm take the brunt of that focused pressure, which quickly leads to numbness and hot spots.
A second issue comes from the locking mechanism and internal springs. Folding knives contain blade channels, lock bars, and pocket clips. A pocket clip might help keep the knife secure in your jeans, but in a carving grip, that metal clip digs directly into your ring finger and palm. Furthermore, the pivot point of a folding blade introduces a small amount of movement known as blade play. Even a tiny fraction of a millimeter of wobble forces your forearm muscles to tense up constantly to keep the cutting path straight.
Finally, standard pocket knives feature relatively thick blade stock, often measuring 3 millimeters or more at the spine. Knife makers choose thick steel so the blade will not snap if an owner pries open a paint can. In woodcraft, however, thick steel acts as a wedge. Instead of severing the wood fibers cleanly, the wide shoulders of the blade pry the wood apart ahead of the cutting edge, which can split your project unexpectedly. A dedicated whittling knife uses thinner blade stock, usually between 1.5 and 2 millimeters, allowing the edge to slice through grain with a fraction of the pushing effort.
Blade length: why shorter gives you more control
When newcomers imagine a carving knife, they often picture a long, sweeping blade. In practice, long blades are dangerous and clumsy for whittling. How does blade length influence your carving accuracy? Think of writing with a pencil. If you hold a pencil near its eraser and try to sign your name, the letters will look shaky and uneven. If you choke up and hold the pencil near the lead tip, your fingers guide the point with high precision. Blade length works on the exact same principle of mechanical leverage.
For beginner woodcraft, the ideal blade length sits between 1.25 inches and 2 inches (roughly 30 to 50 millimeters). A blade in this size range places the sharp edge directly beneath your thumb, which acts as the steering guide and fulcrum for most detailed cuts. Here is how different blade lengths perform in practice:
- Under 1.25 inches (detail blades): Excellent for tight curves, eyes on caricatures, and undercutting small shadows. They lack the length needed for removing large amounts of waste wood quickly.
- 1.5 to 1.75 inches (general whittling blades): The sweet spot for a first knife. Long enough to rough out a basic profile from a rectangular block, yet short enough to keep full control during delicate stopping cuts.
- 2.5 inches and longer (camp and sloyd blades): Useful for smoothing long axe handles, splitting kindling, or carving large spoons. For handheld whittling of figures or small utensils, however, this length increases the risk of slipping off the wood and cutting yourself.
A short blade also demands less effort from your stabilizing muscles. When the tip of your knife is three inches away from your knuckle, the wood pushes back against your hand with considerable mechanical advantage. Shortening that distance cuts the wood's leverage in half, leaving your hand fresh even after an afternoon of shaping pine or basswood.
Carbon steel versus stainless steel for keen edges
Steel choice dictates how easily your knife takes an edge, how sharply it cuts, and how often you need to visit the sharpening bench. The two main families used in carving knives are high-carbon steel and stainless steel. Neither is universally superior, but they behave quite differently against wood fibers.
Carbon steel contains iron and carbon, usually without the heavy additions of chromium found in rust-resistant blades. Because it lacks large chromium carbide clumps in its microscopic structure, carbon steel can be ground to a remarkably fine, keen apex. It is also exceptionally easy to touch up on a leather strop loaded with polishing compound. A carver can often work for weeks using only a strop to maintain a razor edge. The trade-off is rust: carbon steel will discolor, form a gray patina, and rust if left damp or stored in a humid basement.
Stainless steel includes at least 12 to 14 percent chromium. This chromium creates an invisible oxide film that shields the underlying iron from water and wood sap. However, older or cheaper stainless formulations (such as low-grade 420 steel) tend to be gummy on the sharpening stones, developing stubborn burrs that are difficult for beginners to remove. Higher-grade modern stainless steels hold an edge for a long time, but when they do dull, they require diamond or ceramic stones and a patient touch to restore.
| Property | High-Carbon Steel (e.g., 1095, O1) | Budget Stainless Steel (e.g., 420J) | Premium Stainless Steel (e.g., 12C27, VG10) |
|---|---|---|---|
| Ease of Sharpening | Very easy with basic stones | Difficult due to rolled burrs | Moderate; requires fine abrasives |
| Edge Keenness | Extremely high | Moderate to low | Very high |
| Edge Retention in Wood | High if heat-treated properly | Low; edges roll quickly | High to very high |
| Corrosion Resistance | Low; requires light oiling | Very high | High |
For your first knife, high-carbon steel like 1095 or O1 is almost always the better teacher. It provides immediate feedback on your sharpening technique and rewards a quick stropping routine with a glass-smooth cut across the wood grain.
Evaluating handle shape to prevent hand cramps
If the blade does the work on the wood, the handle does the work on your body. Why do so many hands cramp up when using mass-produced craft knives? The problem usually traces back to handles that are either perfectly round or completely flat. A round dowel handle forces your fingers to squeeze tightly to prevent the knife from twisting while cutting. A flat handle digs its corners into your joints. Both extremes exhaust your grip within fifteen minutes.
A good whittling handle should feature an oval or teardrop cross-section. When you hold an oval handle, your fingers can feel the orientation of the blade without your eyes needing to look at it. This anatomical feedback allows you to relax your grip, relying on the palm of your hand to drive the knife forward rather than death-gripping the tool with your finger tips.
Look closely at how the handle fills your palm. It should be wide enough that your fingertips do not press deep into your own palm pad when closed. Natural hardwoods like ash, cherry, beech, or walnut make wonderful handles because they absorb a small amount of hand sweat, preventing slickness without needing aggressive checkering that can blister uncalloused skin. Barrel-shaped handles, which swell gently in the middle and taper toward both ends, accommodate multiple grips, including the thumb-push cut, the pull cut, and the peeling grip.
Testing blade grind angles on soft basswood
A knife's grind refers to the cross-sectional shape of the blade as it tapers from the thick spine down to the razor edge. The two most common grinds for whittling are the Scandinavian grind (Scandi) and the flat grind with a micro-bevel. Each interacts with wood fibers in a distinct way.
A Scandi grind features a single wide bevel that runs straight to the cutting edge with no secondary angle. It acts like a tiny wood chisel. The broad, flat surface rests directly on the wood, making it very simple to maintain a consistent angle as you push. However, because the bevel is wide, it can bite too deep if you tilt the blade even slightly. A full flat grind tapers smoothly from the spine down to a small, secondary cutting bevel. This profile creates less drag when making deep cuts or carving curved recesses.
The total included angle of the cutting edge is critical. An everyday utility knife often has a broad 40-degree included angle (20 degrees per side) designed to survive impacts with staples or nails. A proper whittling knife needs an included angle between 20 and 24 degrees (10 to 12 degrees per side). If you are unsure of your knife's readiness, test it on a clean piece of soft basswood using this evaluation sequence:
- Perform a straight push cut: Push the blade forward across the grain. The knife should shave a curl thin enough to read newspaper text through, leaving a glossy, mirror-like surface on the wood below. If the surface looks dull, pale, or fuzzy, the edge angle is too blunt or the steel is dull.
- Listen to the cut: A sharp, correctly ground edge makes a quiet, crisp whispering sound as it severs wood fibers. A tearing or crunching sound means the edge is crushing the cell walls instead of cutting them cleanly.
- Test an end-grain slice: Cut across the rings at the end of your block. End grain is the supreme test of edge geometry. If the knife stalls or leaves white scratch lines, the blade requires further thinning or polishing on a strop.
Common mistakes when buying a first carving knife
Beginners frequently waste money on tools that look impressive but fail at the bench. One frequent misstep is purchasing an inexpensive twelve-piece carving set from an online marketplace. These kits almost always feature soft steel that cannot hold an edge, set into loose handles with fragile brass collars. You will spend ninety percent of your time fighting a dull blade and wondering why your cuts look ragged. One well-made knife from a respected manufacturer is worth far more than a dozen poor blades.
Another common mistake is choosing a blade with a serrated section or a clip-point tip that is too fragile. Serrations rip wood fibers apart and cannot be sharpened with woodcraft stones. Extreme clip-point tips, often seen on classic stockman pocket knives, snap easily if you twist the blade to pop out a wooden chip. Stick to straight-back blades, gentle drop points, or wharncliffe profiles where the cutting edge is dead straight and the tip is robust.
Next practical steps
Once you understand blade geometry, steel types, and handle ergonomics, you can select your knife with confidence. Before making your purchase and shaving your first wooden block, put the following items in order:
- Acquire a cut-resistant carving glove: Buy a glove rated ANSI Level 5 or higher for the hand that holds the wood. Carving slips happen quickly, especially when you are learning how wood grain shifts direction around knots. If you ever experience a deep puncture wound or tendon injury while carving, consult a medical professional immediately rather than relying solely on home first aid.
- Source clear basswood: Pick up a few blocks of kiln-dried American basswood (Tilia americana). Basswood has a fine, uniform grain with very little density difference between earlywood and latewood rings, making it the most forgiving material for a new carver.
- Build or buy a simple strop: Glue a strip of vegetable-tanned leather to a flat board of scrap hardwood. Rub the leather with fine green chromium oxide honing compound. Stropping your knife for two minutes after every thirty minutes of carving will keep your edge keen without wearing away steel on coarse stones.
Pick a single knife that feels solid in your hand, check its bevel angle, and begin with simple practice cuts: straight stop cuts, gentle rounding passes, and neat pyramids. Learning how the wood fibers respond to your tool will teach you more about knife selection than any catalog ever could.